It’s straightforward to make quick edits to WordPress published posts – especially with the WordPress block editor. Hop in anytime to edit a word or change an image.
If you add or edit images, make sure you read my post on editing images for the web.
Let’s log in to WordPress and open up the post that we want to edit.
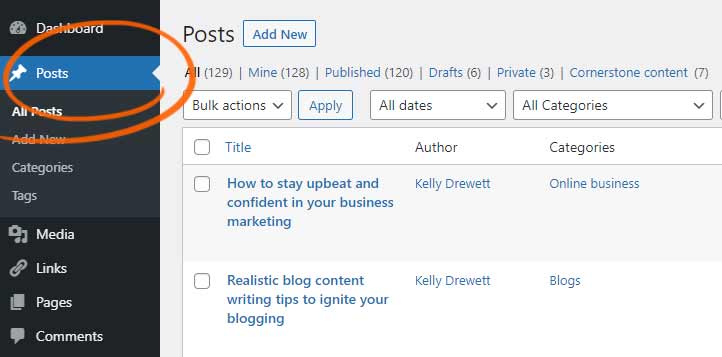
Once logged in, choose POSTS from the left-hand menu. You’ll arrive at the ALL POSTS screen.
How to Find a Specific Blog Post on WordPress
To find a specific post, use the search field at the top of the blog post page.
If you have a few blog posts, it’s easiest to search by the title. However, you can search for words within the pages too. We find this most helpful when we know we’ve written about something but can’t remember where it is.
Type the word and hit the SEARCH POSTS button.
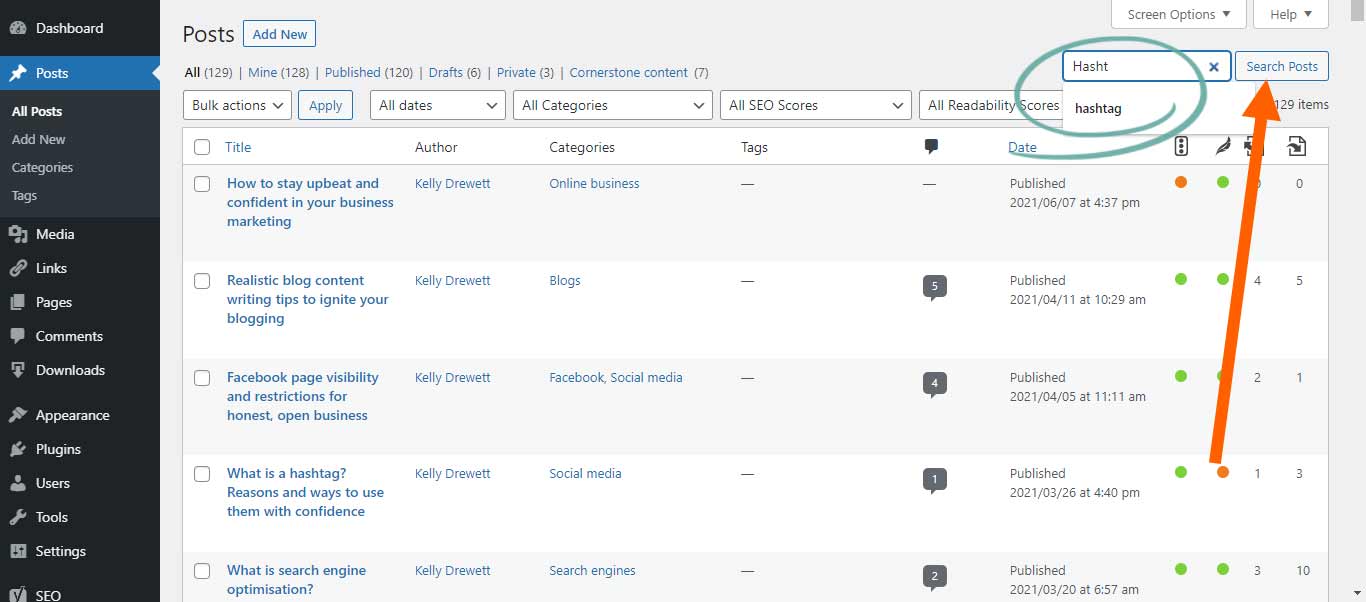
Another great way to find specific blog posts is to use the columns.
You can click the DATE column header to sort the posts by date.
Or, use the drop-down menus above the post list to find posts you published in certain months or categories.
If you are using Yoast, like me, you can also list posts by SEO/readability scores to improve them.

Edit a Published Post
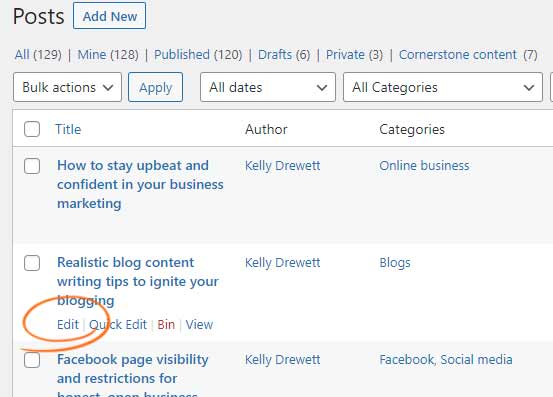
- On the posts page, you’ll see a list of the posts.
- Hover over the post name, and a menu will appear: EDIT | QUICK EDIT | BIN | VIEW.
- Hit EDIT, which will take you straight to the post page, where you can make quick changes.
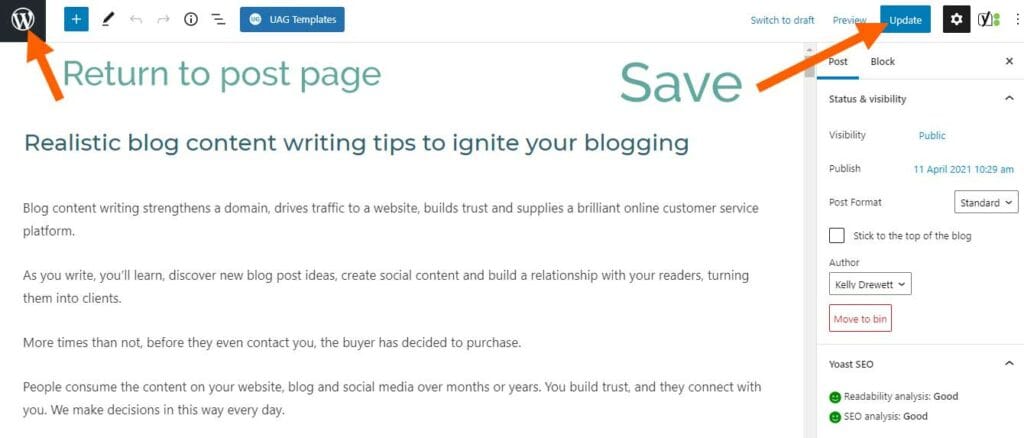
Once on the post page, be aware that WordPress now uses the block editor, so each heading, paragraph, and image will be within a block.
WordPress will also automatically go to FULL SCREEN here, which means you lose the menu on the left. Just hit the WordPress W logo top left to get back.
To find out more about the block editor, click here.
Edit a Word Within a WordPress Post
To edit a word or complete sentence in a paragraph or heading, just select the word you’d like to change.
Double-click a word to select the whole thing. Click down and drag to select entire sentences.
Change the word simply by typing or deleting the unwanted text.
Now hit the blue UPDATE button to save the blog post. It’s at the top right of the screen.
Avoid Editing the Title
A quick note to ask you to be careful if you’d like to edit the post’s title. A blog post title becomes the “Heading 1” tag, and it’s essential for search engine optimisation.
You’ll need to think more about your SEO if you want to edit this.
Find out more about writing blog post headings here.
Edit an Image Within a WordPress Post
There are two standard ways to include an image with a WordPress blog post. They can sit within the text content or be used as a featured image.
Featured images are often used on blog posts (rather than pages) because they look great on the post archive page. That’s the page that lists all the blog posts – commonly accessed using a BLOG button.
Both are easy to change, but make sure you have resized and compressed the images for the web.
Why Resize Images for the Web?
Edit a Featured Image on a Blog Post
When on the blog post edit screen, WordPress defaults to a full-size screen to help you write without distraction.
That makes the FEATURED IMAGE hard to find.
You’ll need to access the post settings by clicking the cog in the top right.
Once the menu appears, click the POST tab at the top to view the post settings (not the block settings).
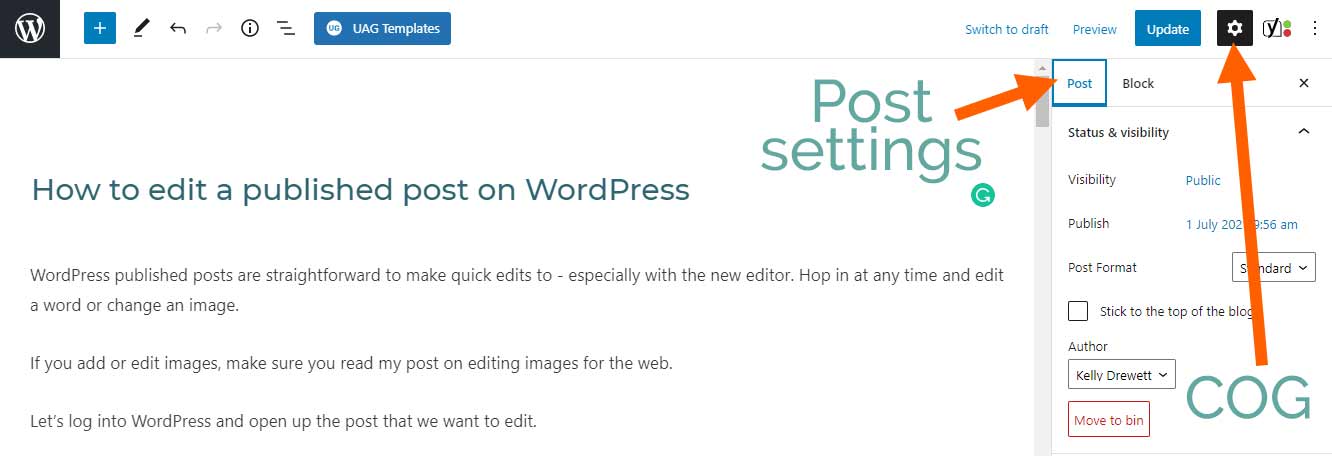
Now, scroll down these settings to find the FEATURED IMAGE option.
Sometimes it is hidden (or collapsed). Click the little arrow to the right of the text to reveal the featured image button.

Whether the featured image is in use or not, just hit the featured image area to select or upload a new one.
A featured image looks much nicer in landscape format.
Edit an Image Within the Text of a Blog Post
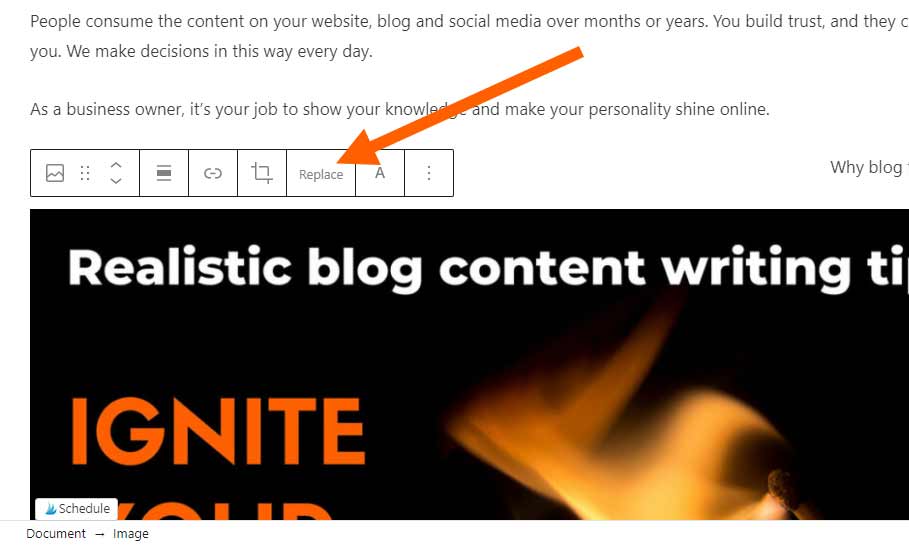
Just like paragraphs, each image will be in its own block.
All you need to do is click the image with your mouse to reveal a toolbar.
Look for the REPLACE button to select or upload a new image.
Change the Date of a Published Blog Post
The publication date of a blog post is used in sitemaps and search results, so try to keep it up to date. Up-to-date posts are a positive signal to search engines.
If you change a post significantly, update the published date too.
However, don’t change the date if you’ve just edited a few words. Search engines can compare the current version with the original. Changing dates could be seen as a black-hat SEO tactic.
Okay – so you’ve significantly changed the post, let’s change the date to reflect your updates.
You’ll need to access the post settings by clicking the cog in the top right.
Once the menu appears, click the POST tab at the top to view the post settings (not the block settings).
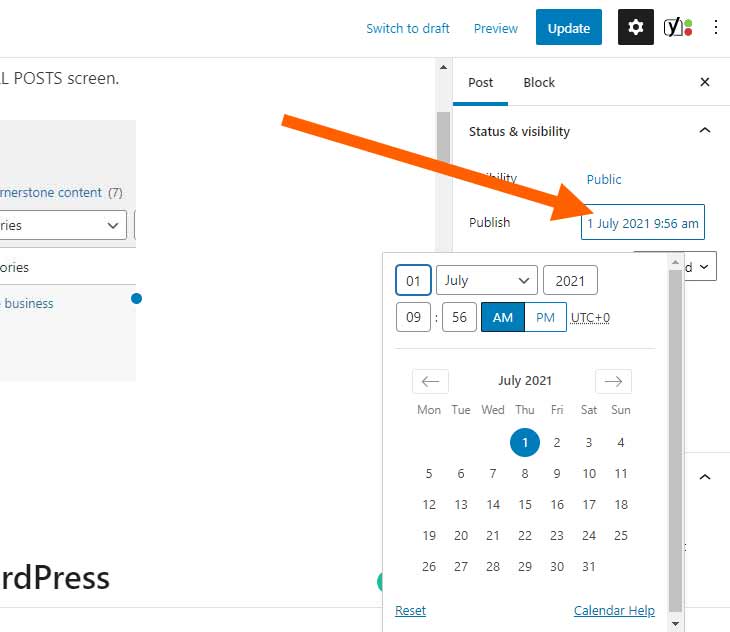
At the top of the settings area, you’ll see STATUS AND VISIBILITY. Hit the small arrow to the right of the text to reveal the settings.
When a post is published, a date will appear next to the word ‘Published’.
All you need to do is tap that date. Now you can choose the current date from a calendar.
Save and update the post.
Be sure to edit any sitemap that you use for SEO purposes.
Have fun editing your published posts on WordPress!