Released in 2008, the Divi Builder is a drag-and-drop page builder to help edit WordPress – it enables easy to use columns and modules on WordPress a page or post.
We couldn’t create columns in the classic WordPress page editor until 2018, after the release of WordPress blocks. So the Divi Builder has been a useful tool and is only getting more powerful.
To use the Divi Builder to edit a WordPress page you’ll need to use one of the Elegant Themes WordPress themes, and, here, we’ll look at the builder’s sections, rows, columns and modules.
As usual, I recommend that you back up the website before updating it in WordPress.
Using the Divi Builder
Once logged in to your admin area, notice the left-hand menu. This menu is your way to almost everything when editing with WordPress.
Choose Posts or Pages, then choose to edit.
When the Divi Builder isn’t in use on the page, you’ll see a purple labelled ‘Use The Divi Builder’. To convert the page to Divi, hit this.
When the Divi builder is in use, you’ll see two buttons – Return to Standard Editor and Build On The Front End.
Below there will be an area with a purple bar for the header. This is the Divi builder that will contain rows and sections.
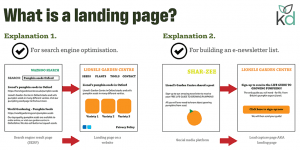
Editing a WordPress page using the Divi Builder
I compare the back-end (WordPress admin area) with the front end (the live site) to grasp the layout.
You will likely see columns of text or images on the live page.
Now, look at the back end. In Divi Builder, you can probably make out the sections that are stackable blocks.
Everything starts with a section.
Colours represent sections within the Divi Builder:
- Blue represents a standard section.
- Purple is a full-width section.
- Orange is a speciality section (there can be multiple rows within a column).
- The turquoise colour represents a row. A row could contain up to 6 columns.
We add rows into sections using the PLUS icon found at the bottom of any section. On the image below, the arrow points to the PLUS icon.
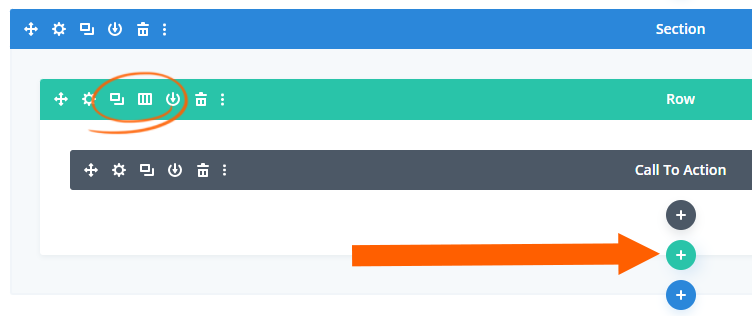
To change the number of columns in a row, use the icons within the turquoise header. To the left of the row.
Find the icon fourth from the left, which looks like a box with three columns. It’s circled on the image above.
Grey represents a module.
We insert images, text, buttons, accordions and other items by adding modules to the rows.
Modules can be put inside columns or directly into a row.
There are 48 available modules – 39 of these modules are for use within the regular width sections.
9 are for use ONLY within a full-width section.
Edit a module in Divi Builder
To edit a module, click the cog icon, top left, as outlined in the image below.
A lightbox opens, enabling you to edit the contents of that module.
There are three tabs – CONTENT, DESIGN and ADVANCED.
It’s worth looking at the settings on these tabs – as a designer, you can make some significant changes.
Let’s look at editing the text within pages.
Editing a text module in Divi Builder
The text module is probably the most frequently used of all the Divi Builder modules.
- Hit the edit COG to edit the text module. Here you can change fonts, colour and alignment.
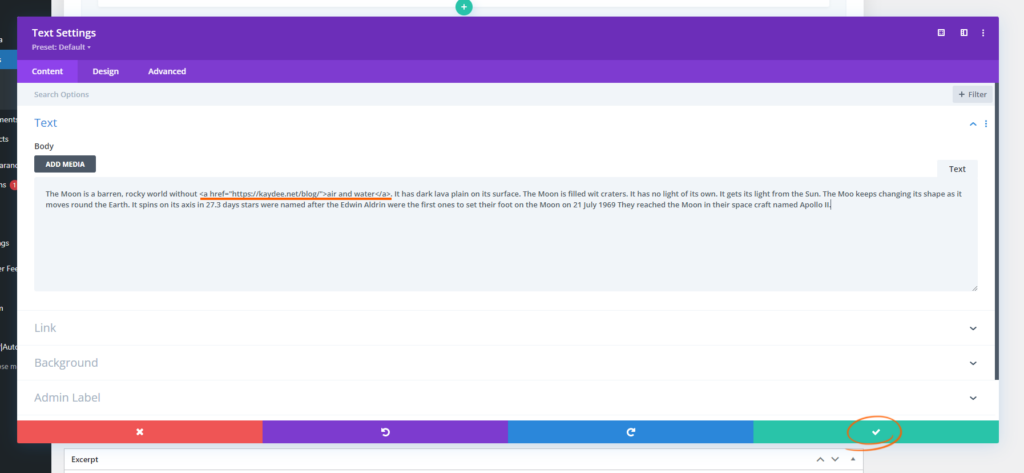
- The first tab shows the content box – this is where to change the text directly, in the BODY box.
- Text modules are infinite, so you can keep adding to them. Check the front end to see how it looks.
- Once you have finished, click the turquoise button with a TICK on it, lower right.
- You must also click UPDATE on the WordPress page to save the work.
Now check the public side of the site. Hit REFRESH (F5) when viewing the page to see your changes.
To create a link within a Divi text module, you’ll need to use HTML code.
Copy and paste the code here:
<a href="https://websiteaddress.com/">link text</a>Just replace the link text and the website address.
You can also create hyperlinks within modules.
Edit an image module in Divi Builder
Whenever you use an image within WordPress, size it down to the correct size first.
One that comes straight from your camera is not too big in file size to use on a website.
Read my post – How to resize an image for the web, then return here to continue.
Now you have the image at the correct size, add it to the image module.
- Click the great PLUS icon to add a module to a row. Choose image.
- Within the lightbox is another PLUS icon to add an image. Click this to go to the MEDIA LIBRARY.
- You may want to choose an image from here or hit the UPLOAD FILES tab to upload a new image.
- Hit set as image. Now click the green TICK button, then remember to hit UPDATE on the page to save.
Click REFRESH (F5) when viewing the public page to see your changes.
All modules are edited in a similar way.
Moving Divi Builder rows and modules
To move a row or a module, use the move icon, top left of any section, row or module. Click and hold the arrow icon and drag it to the new place.
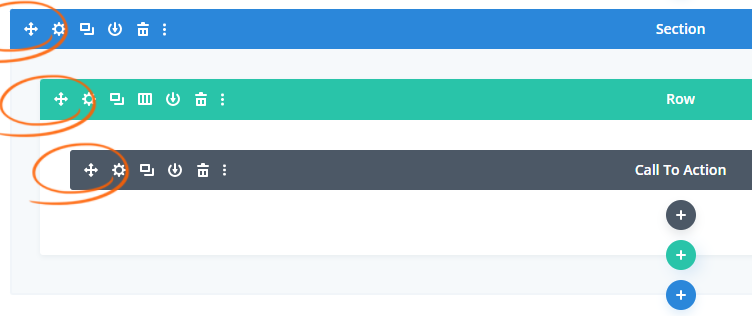
Rows can’t be dragged into a full-width, purple section – there are just 9 modules that can be used within the full-width sections, so remember that when adding modules to new places. All the full-width modules are proceeded with ‘Fullwidth’.
I hope this post helps you use Divi Builder to edit WordPress pages – of course, there is so much more Divi can do.
Let me know if you have any questions in the comments section.